This tutorial is part of Okta Workflows with Microsoft series:
- Send an Email Notification for a New Okta Event
- Send a Notification to Microsoft Teams for a New Okta Event
- Send a Rich Message to Microsoft Teams for a New Okta Event Using Microsoft API
This step-by-step tutorial will teach you how to send a rich message to Microsoft Teams.
This tutorial uses the flow you built in the Send Microsoft Teams Notification for a New Okta Event tutorial.
Things you will learn:
- How to send a rich message with Microsoft API.
- How to use the Custom API Action card with Microsoft API.
The flow you built in the previous tutorial sends a text message to Microsoft Teams:
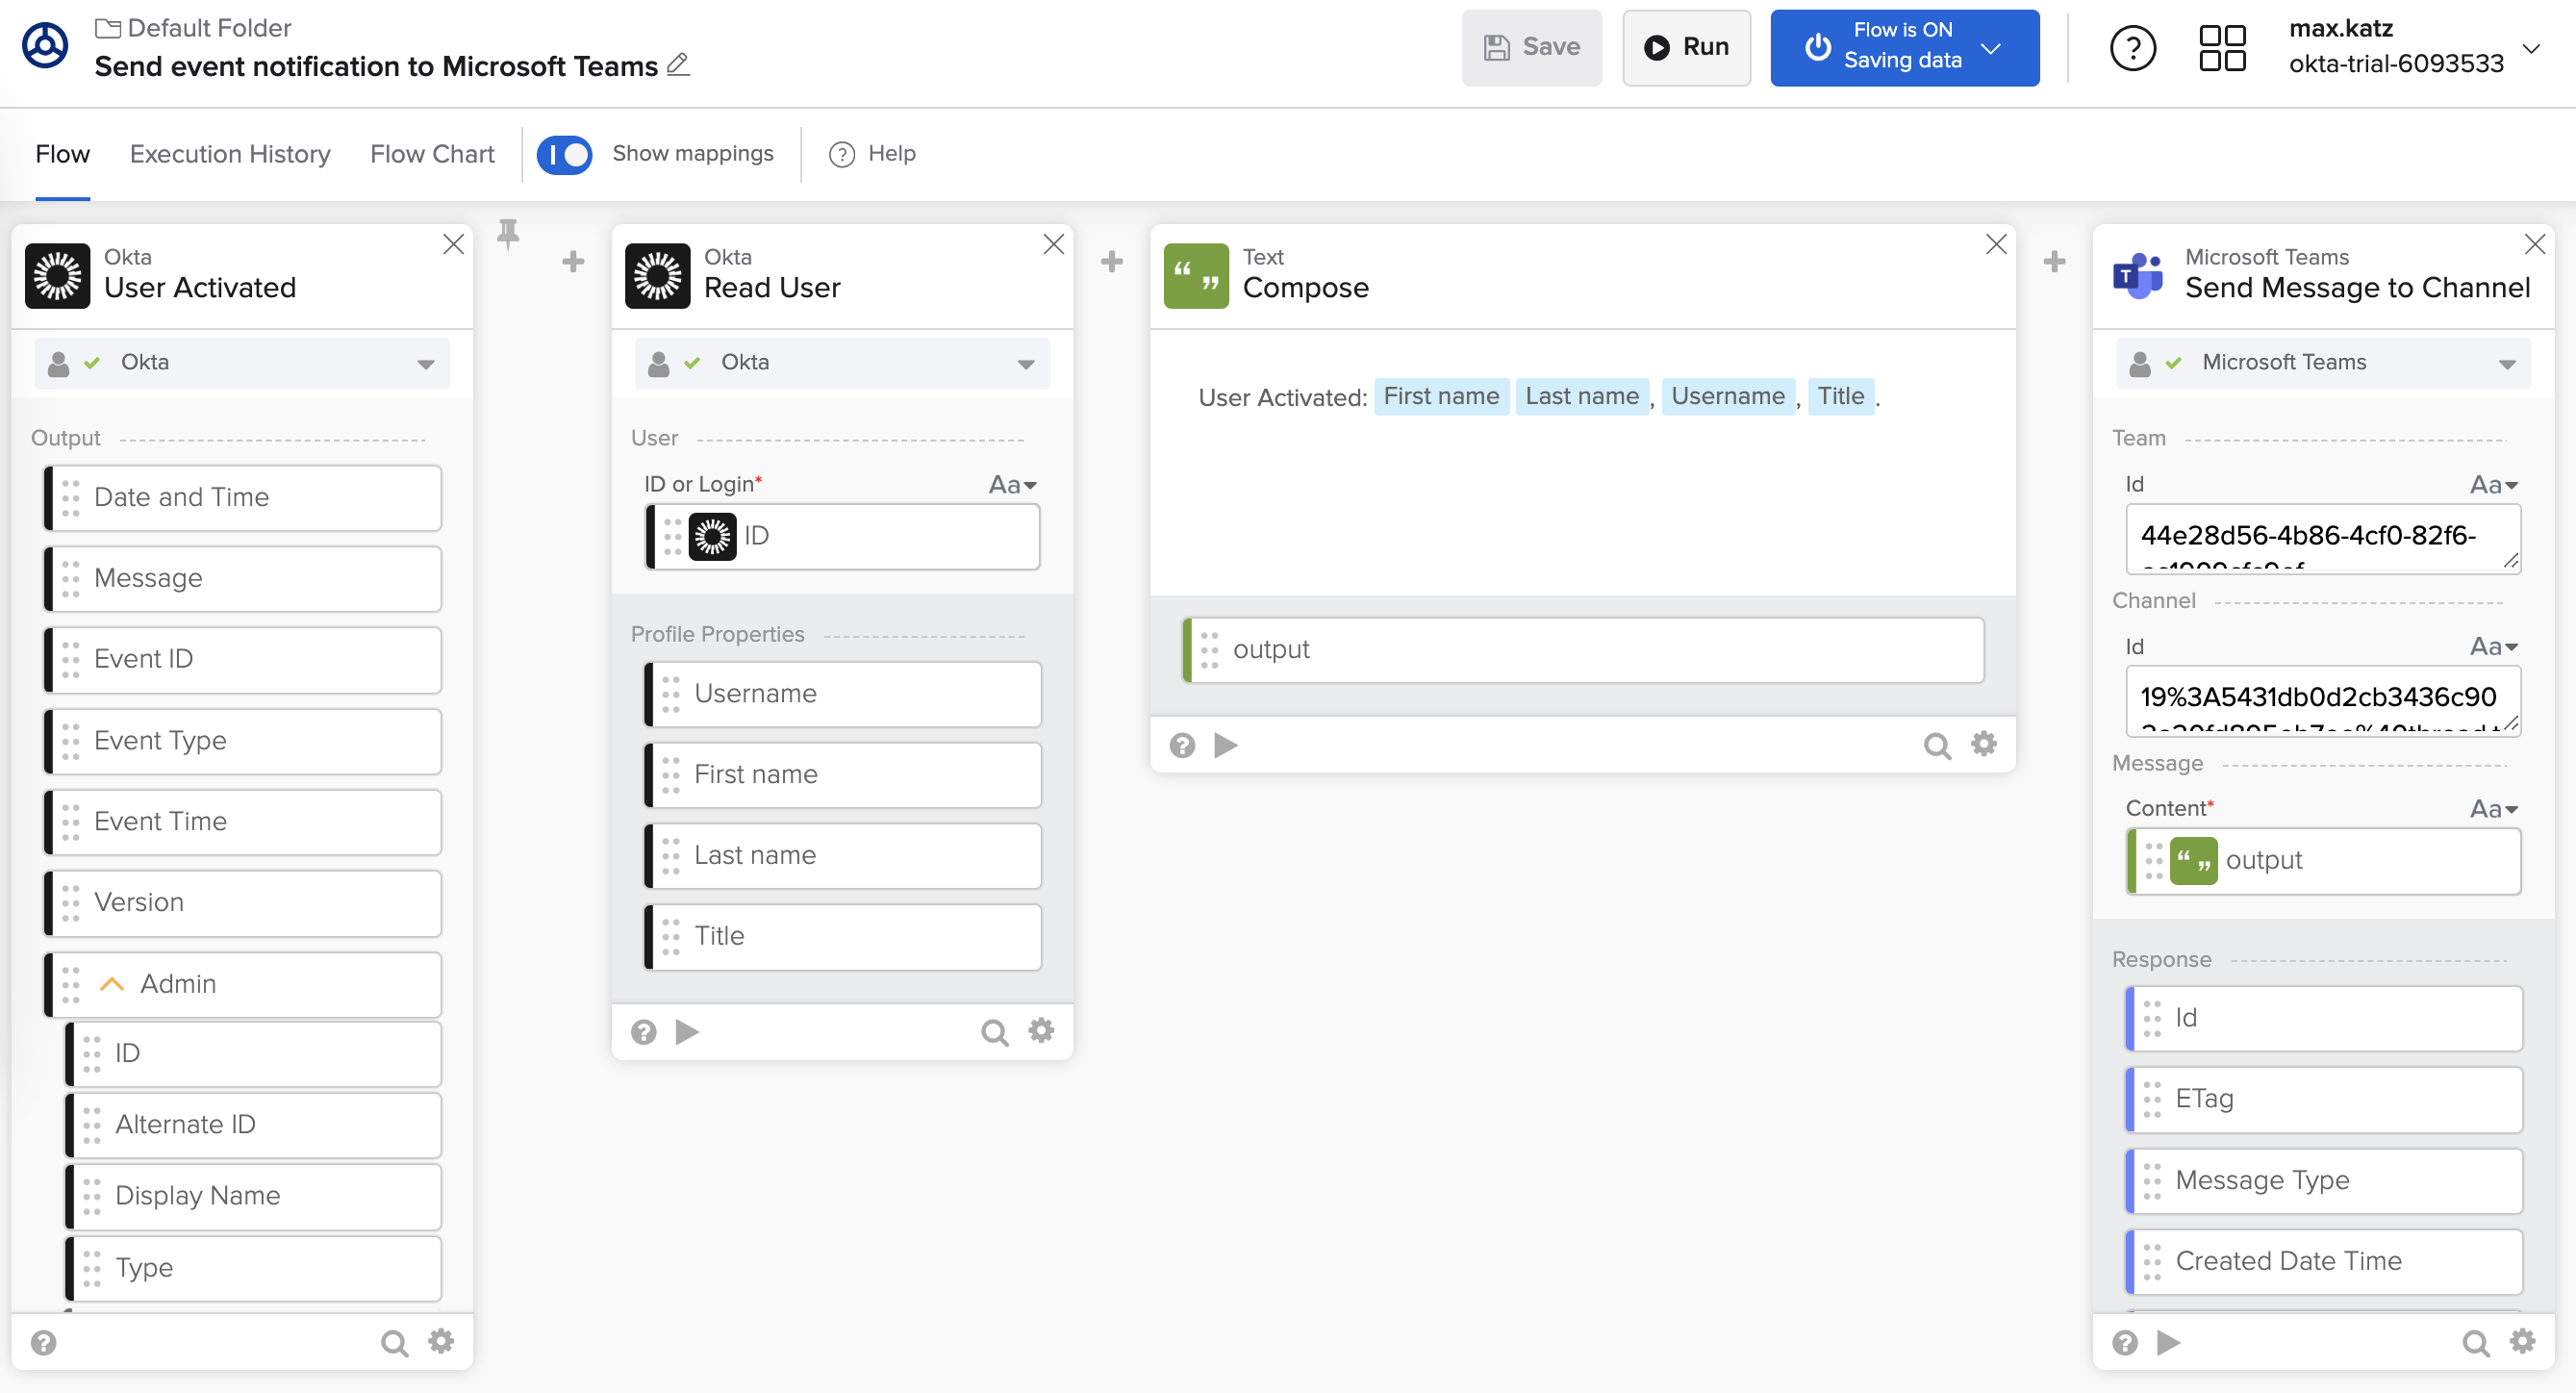
The flow to send plain text messages to Microsoft Teams.
Send a rich message with Microsoft API
The flow you built in the Okta Workflows Tutorial: Send Microsoft Teams Notification for a New Okta Event uses the Send to Message to Channel pre-built action on the Microsoft Teams connector.
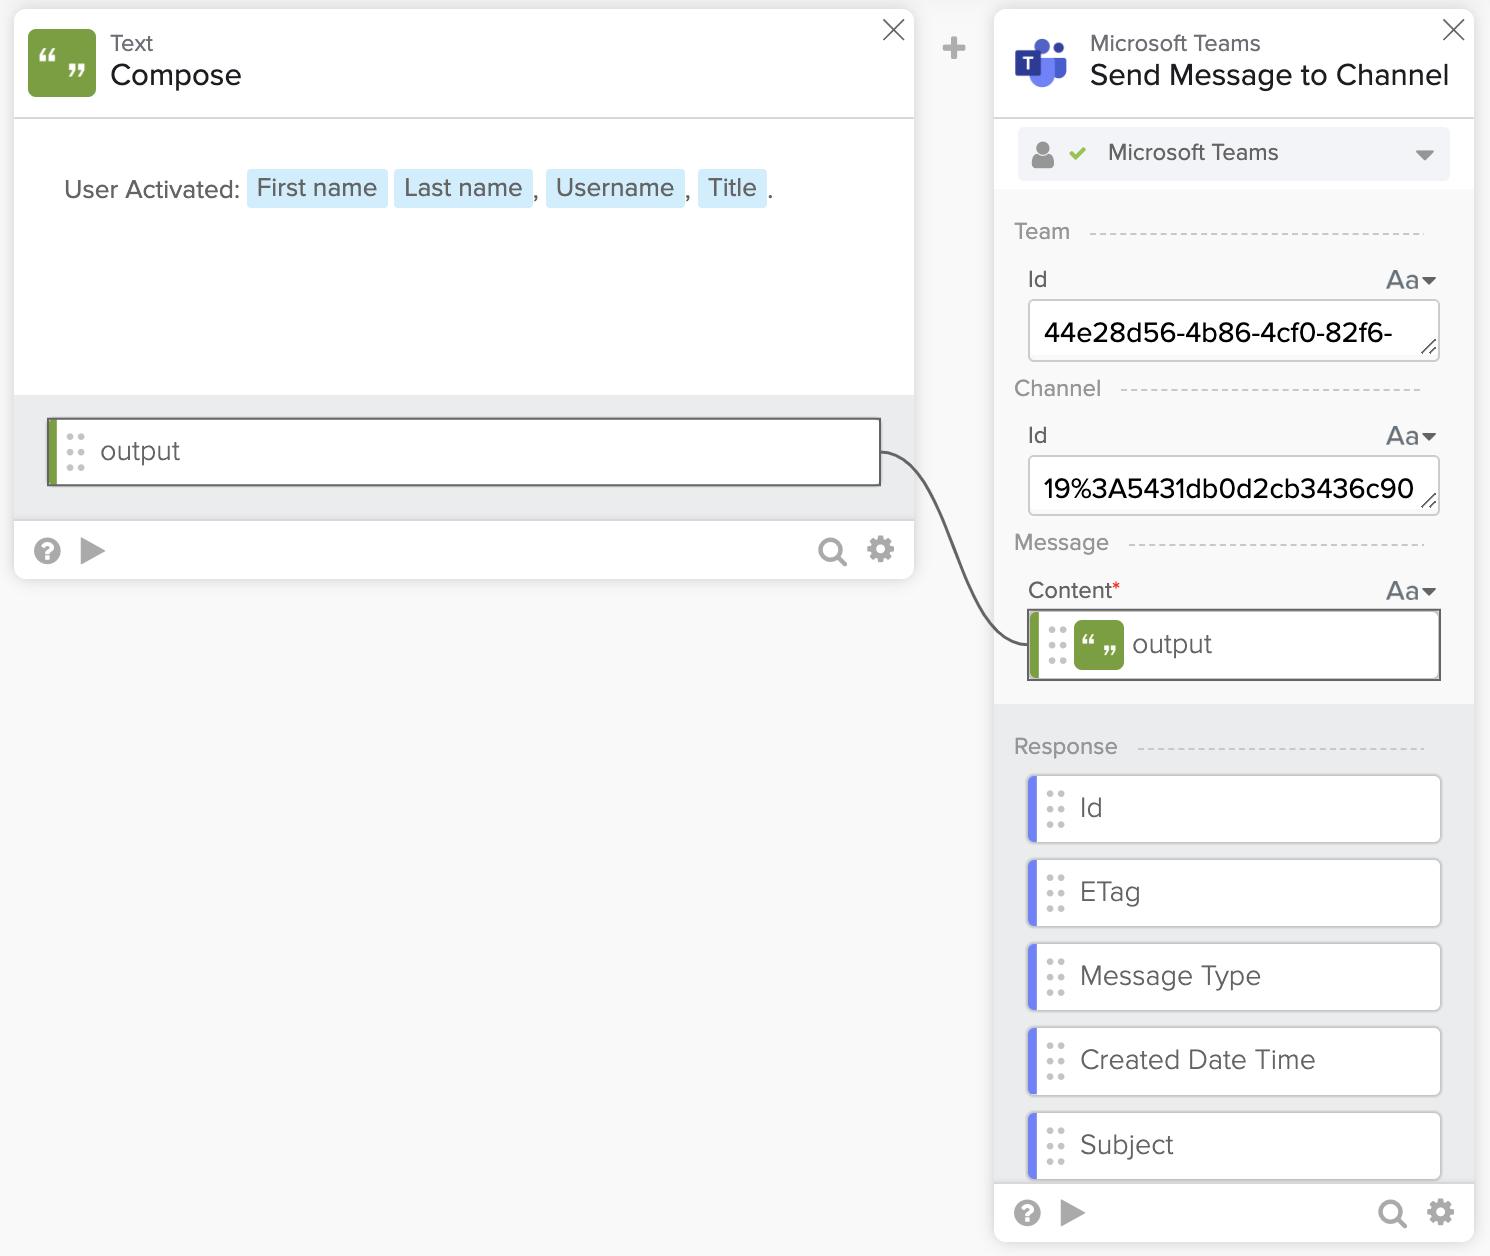
Sending a text message to Microsoft Teams.
The Send Message to Channel action sends a text message but doesn’t support sending a rich or HTML message.
Looking at the Microsoft Teams API, it allows sending an HTML message. The screenshot below shows a request with an HTML message.
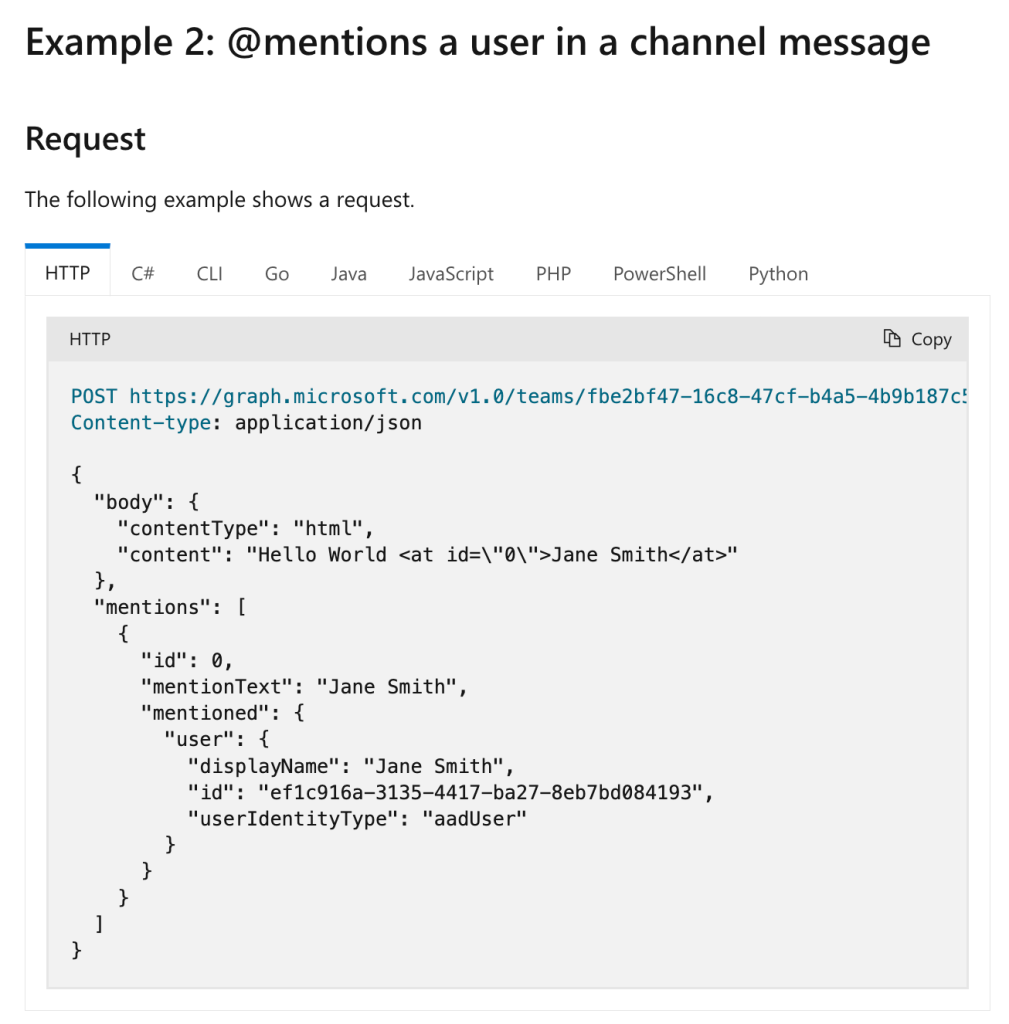
Microsoft Graph API to send a message channel.
You need to set the content type to HTML to send a rich message. Since the contentType parameter is not exposed in the Send Message to Channel action, how do you make such all?
You can use the Custom API Action action on the connector to make this call.
The following section will teach you how to send an HTML message with Microsoft API in Okta Workflows.
Custom API Action
Most connectors have a Custom API Action action.
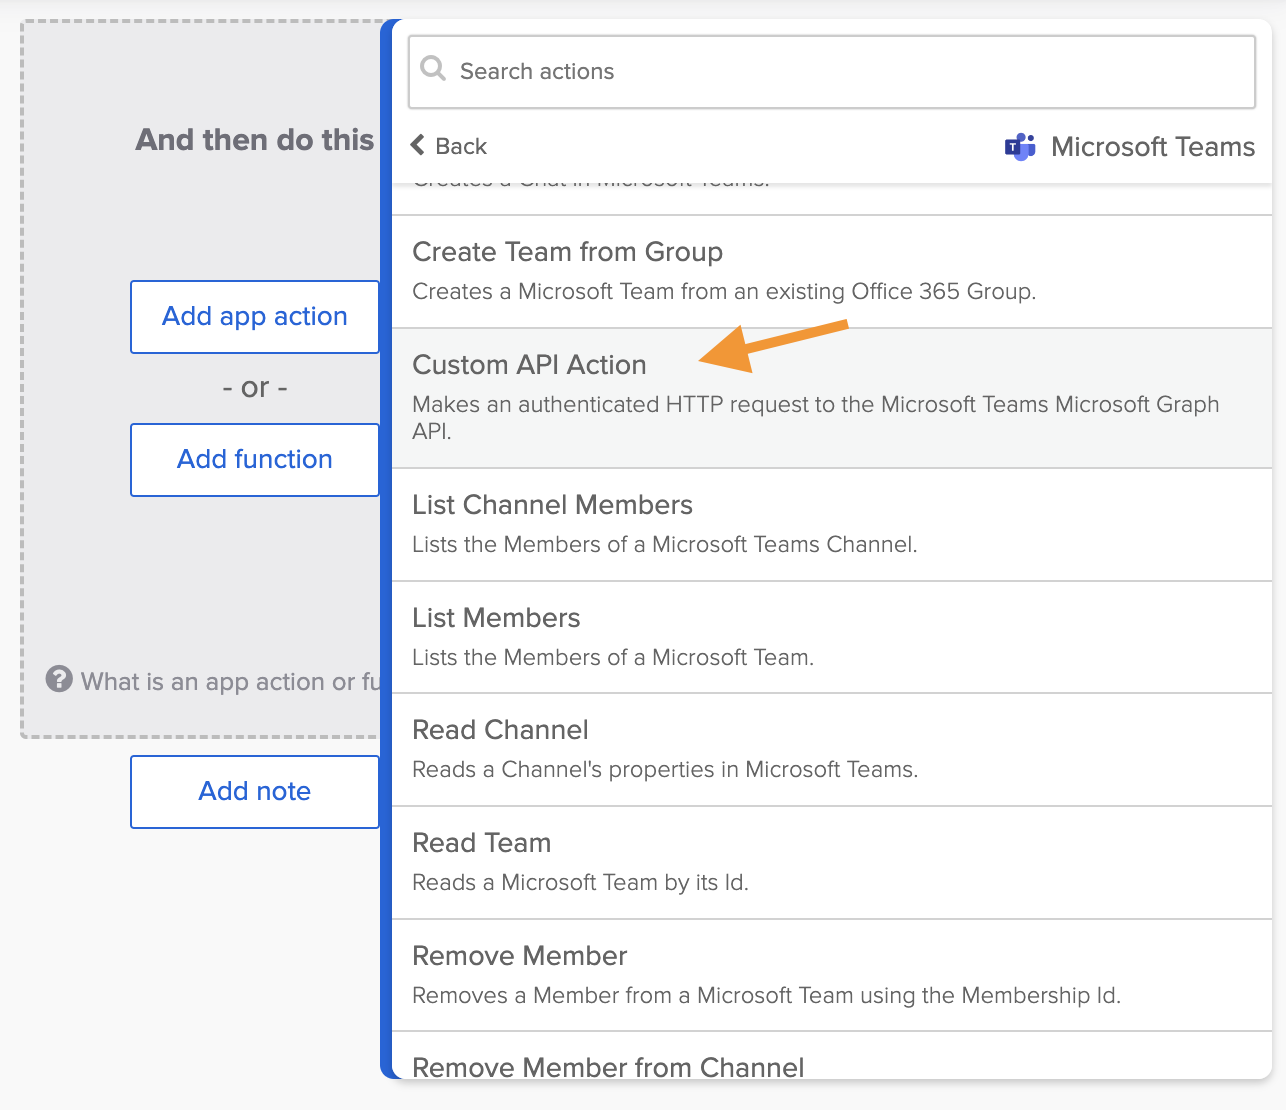
Custom API Action.
A Custom API Action action allows to call any API endpoint available in the connector.
The Custom API Action leverages an exiting connection authentication. You need to specify the relative endpoint URL and any request parameters required.
Learn more about Custom API Action: Four Ways to Call an API in Okta Workflows.
Update the send notification flow
To start, you will make a copy of the flow.
Duplicate the flow
You will make a copy of the flow you built in the Okta Workflows Tutorial: Send Microsoft Teams Notification for a New Okta Event tutorial.
- Duplicate the flow from the folders view.
- In cards view, click duplicate on flow card.
- In listing view, click ⚙️ > duplicate.
- Rename the flow to Send event notification to Microsoft Teams 2.
Add the Microsoft Teams Custom API Action
- Open the Send event notification to Microsoft Teams 2 flow.
- Click Add app action > Microsoft Teams connector > Custom API Action.
- Select POST for Request Type in Options. Click Save.
- On fields selection step, in Inputs:
- Uncheck Query and Headers.
- Check Body.
- Click Save.
The Microsoft Teams – Custom API Action card:
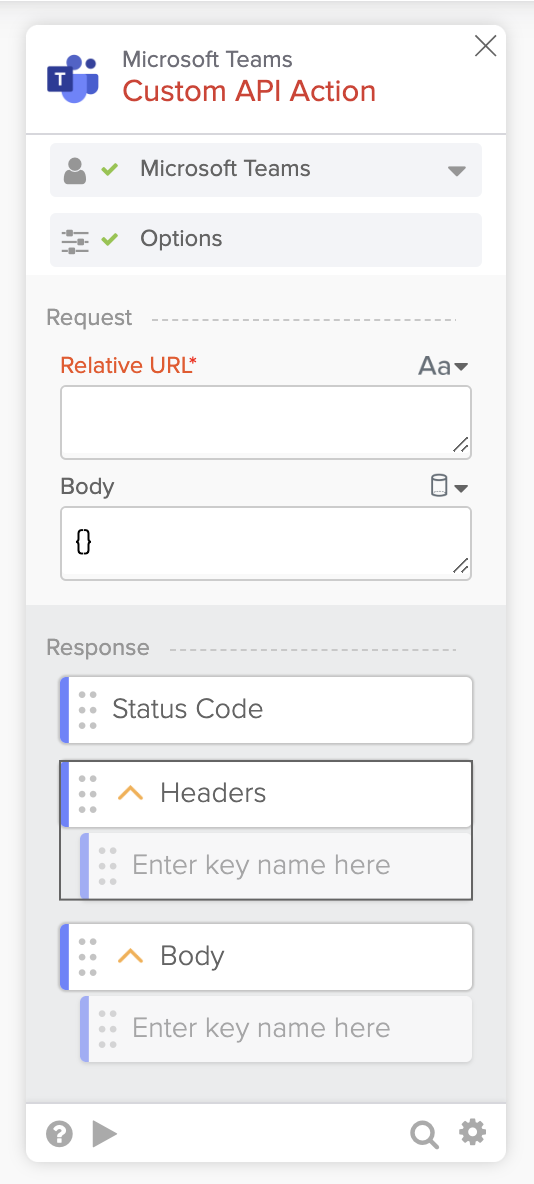
The Microsoft Teams – Custom API Action card.
Since you have a Microsoft Teams connection, the card automatically selects the connection:
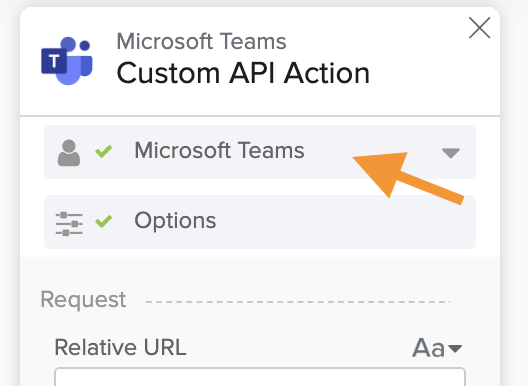
Microsoft Teams connection.
Set card inputs
In this step, you will set up the Custom API Action card inputs.
The relative URL has the following format:
/teams/{Team Id}/channels/{Channel Id}/messages- Use the Team Id and Channel Id values from the Send Message to Channel card in the flow to create the following URL:
/teams/44e28d56-4b86-4cf0-82f6-ac1909cfc9ef/channels/19%3A5431db0d2cb3436c902a20fd805eb7ee%40thread.tacv2/messages- Paste the above URL into the Relative URL field on the Custom API Action card.
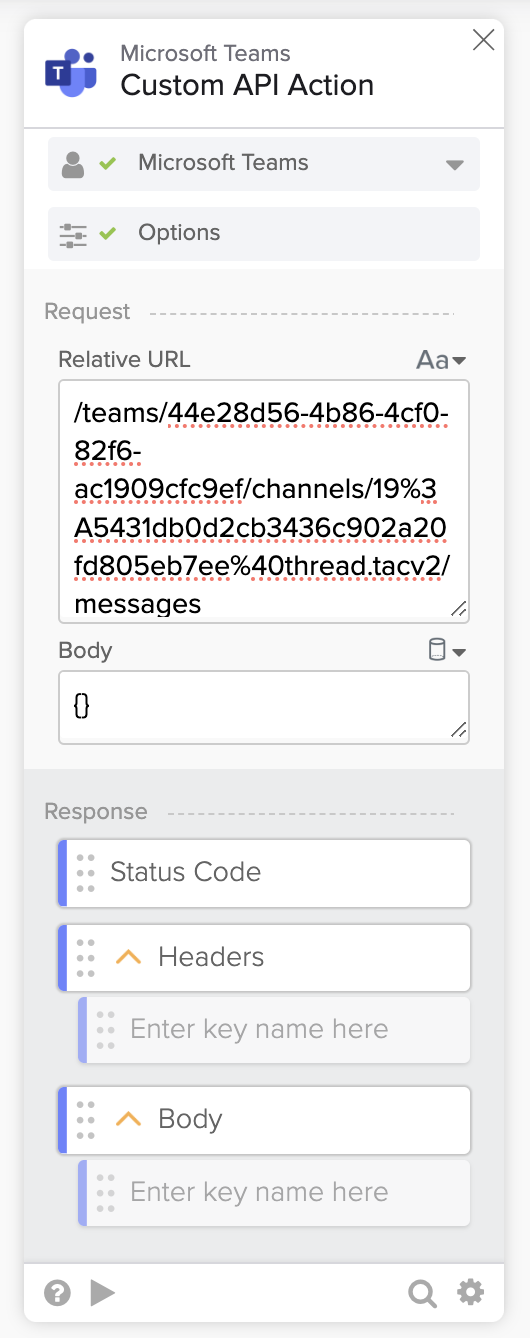
Custom API Action with relative URL set.
Test the Custom API Action card
To test the card, use the following message:
{
"body": {
   "contentType": "html",
   "content": "<b>Hello</b>, <i>Okta Workflows</i>."
}}- To test the card, click ▶️.
- Delete the empty {} and paste the message above into the Body field.
- Check the message in Microsoft Teams.

Rich message in Microsoft Teams.
Delete the Send Message to Channel card
- To remove the Send Message to Channel card, press X in the card’s upper-right corner.
Create a rich message
In this section, you will create a rich message with data from the User Activated event and pass it to the Custom API Action card.
- Replace the text in the Compose card with the following text:
{
  "subject": "🚨 User Activated",
  "body": {
     "contentType": "html",
     "content": "<b></b> (<u></u>), <i></i>."
   }
}
The Compose card:
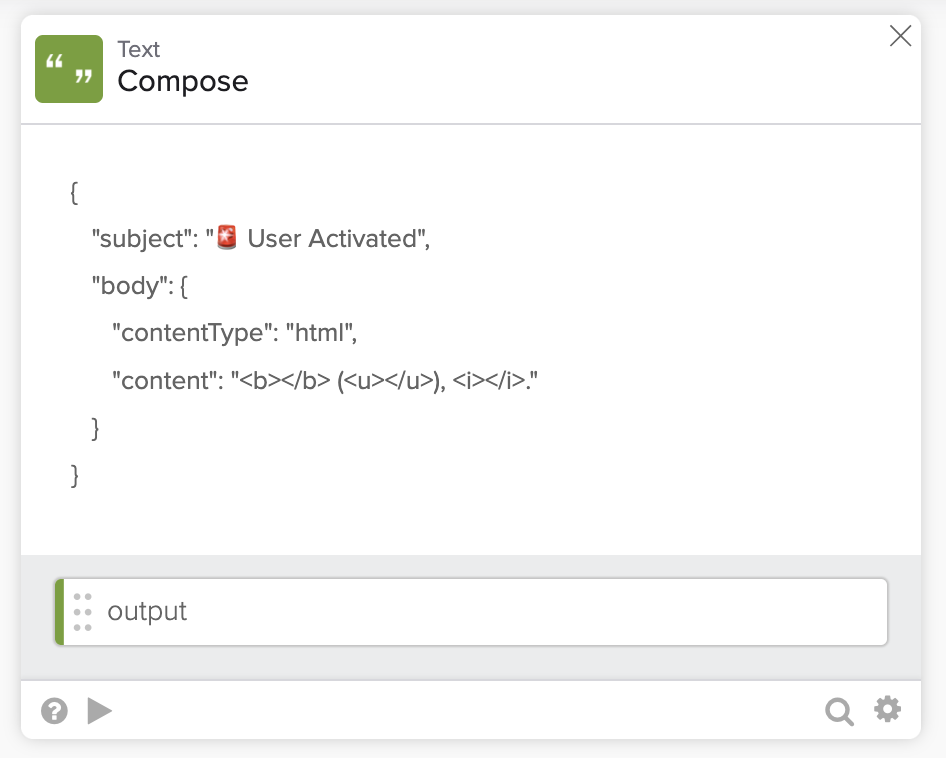
The Compose card with new message.
- Pass the fields from the Read User card to the new Compose card’s message:
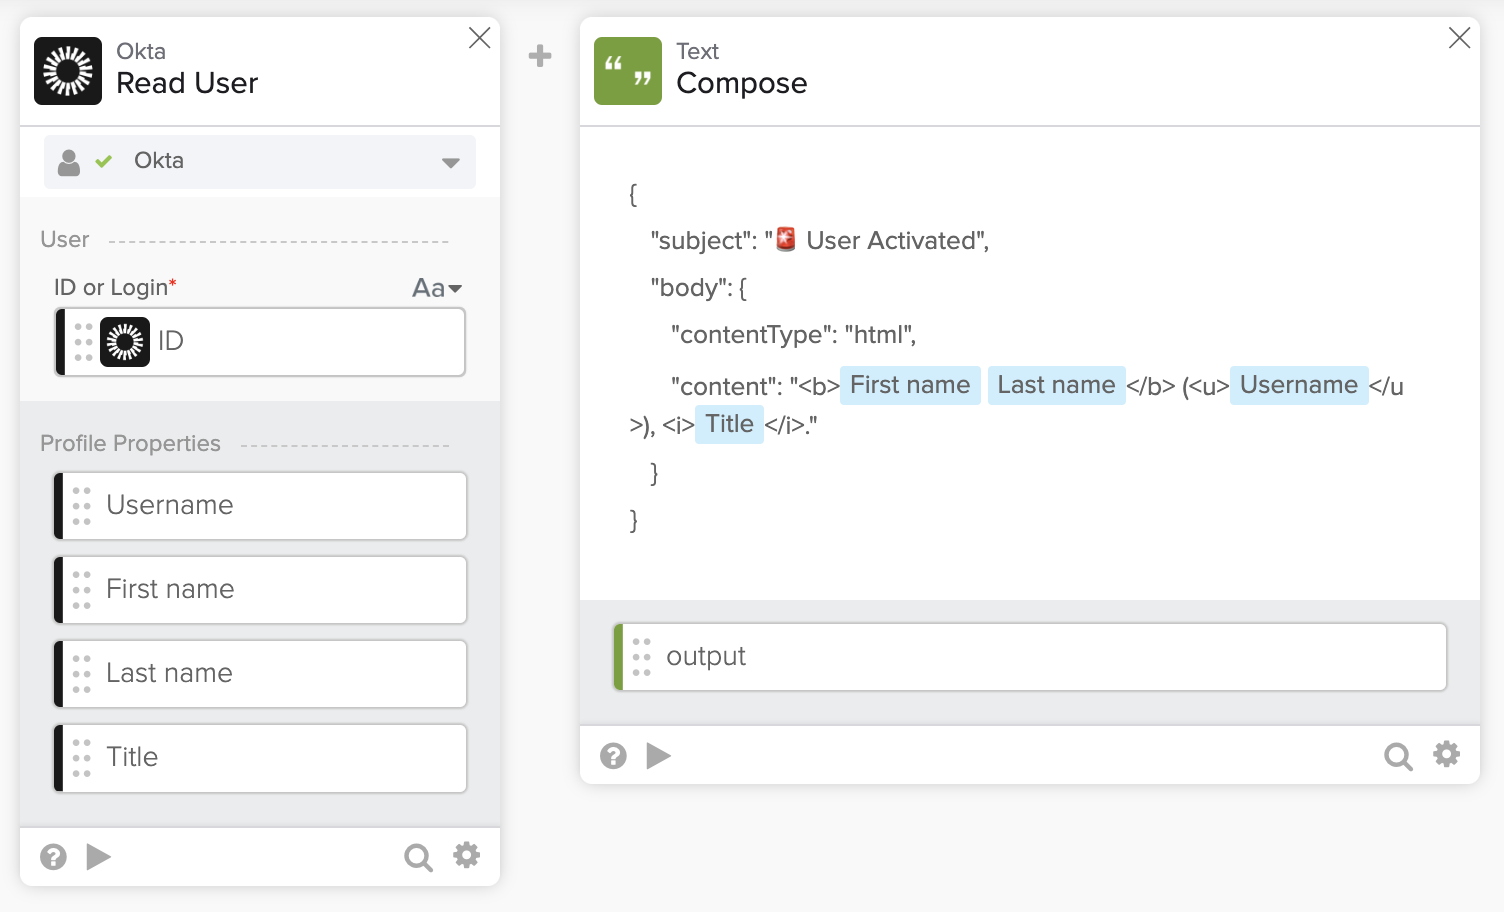
Updated Microsoft Teams message.
The final flow:
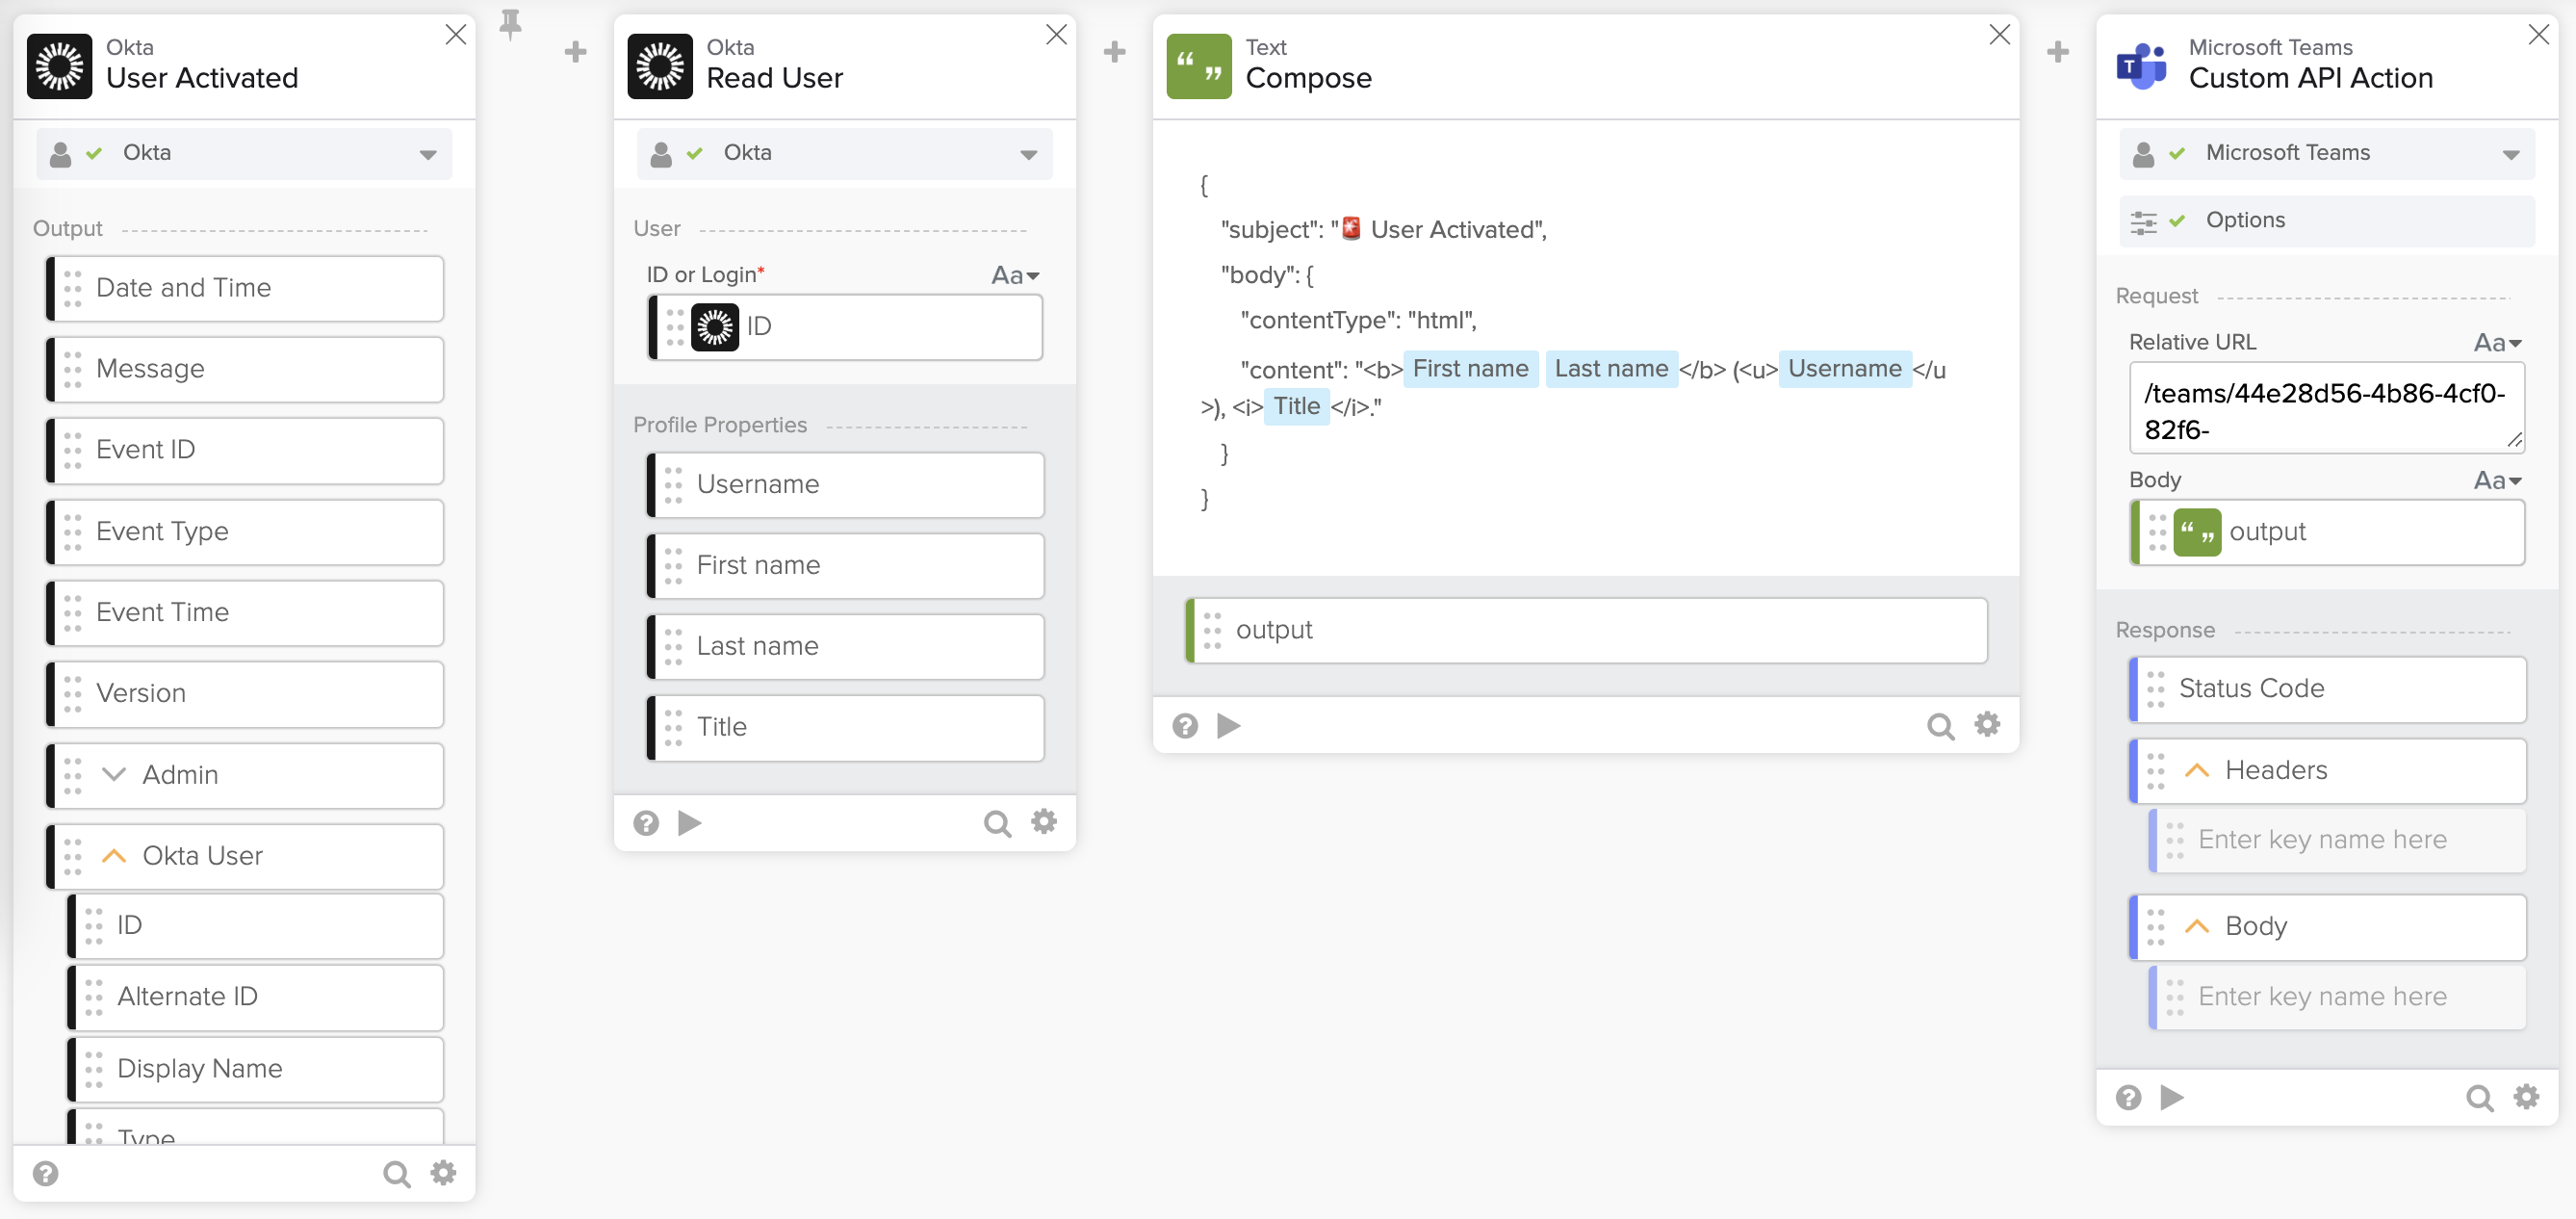
Flow to send a rich message to Microsoft Teams.
In the following step you will test the flow.
Test the flow
Turn off the Send event notification to Microsoft Teams flow you avoid both flows run when you activate a user.
- Save the flow.
- Check the flow is on.
- Go to Okta Admin console > Directory and select a user to activate.
- To deactivate a user first:
- Click on a user to deactivate.
- Click More Actions > Deactivate.
- Click Deactivate to confirm.
- To deactivate a user first:
- Click the Activate and Activate again to confirm.
Flow execution when activating a user:
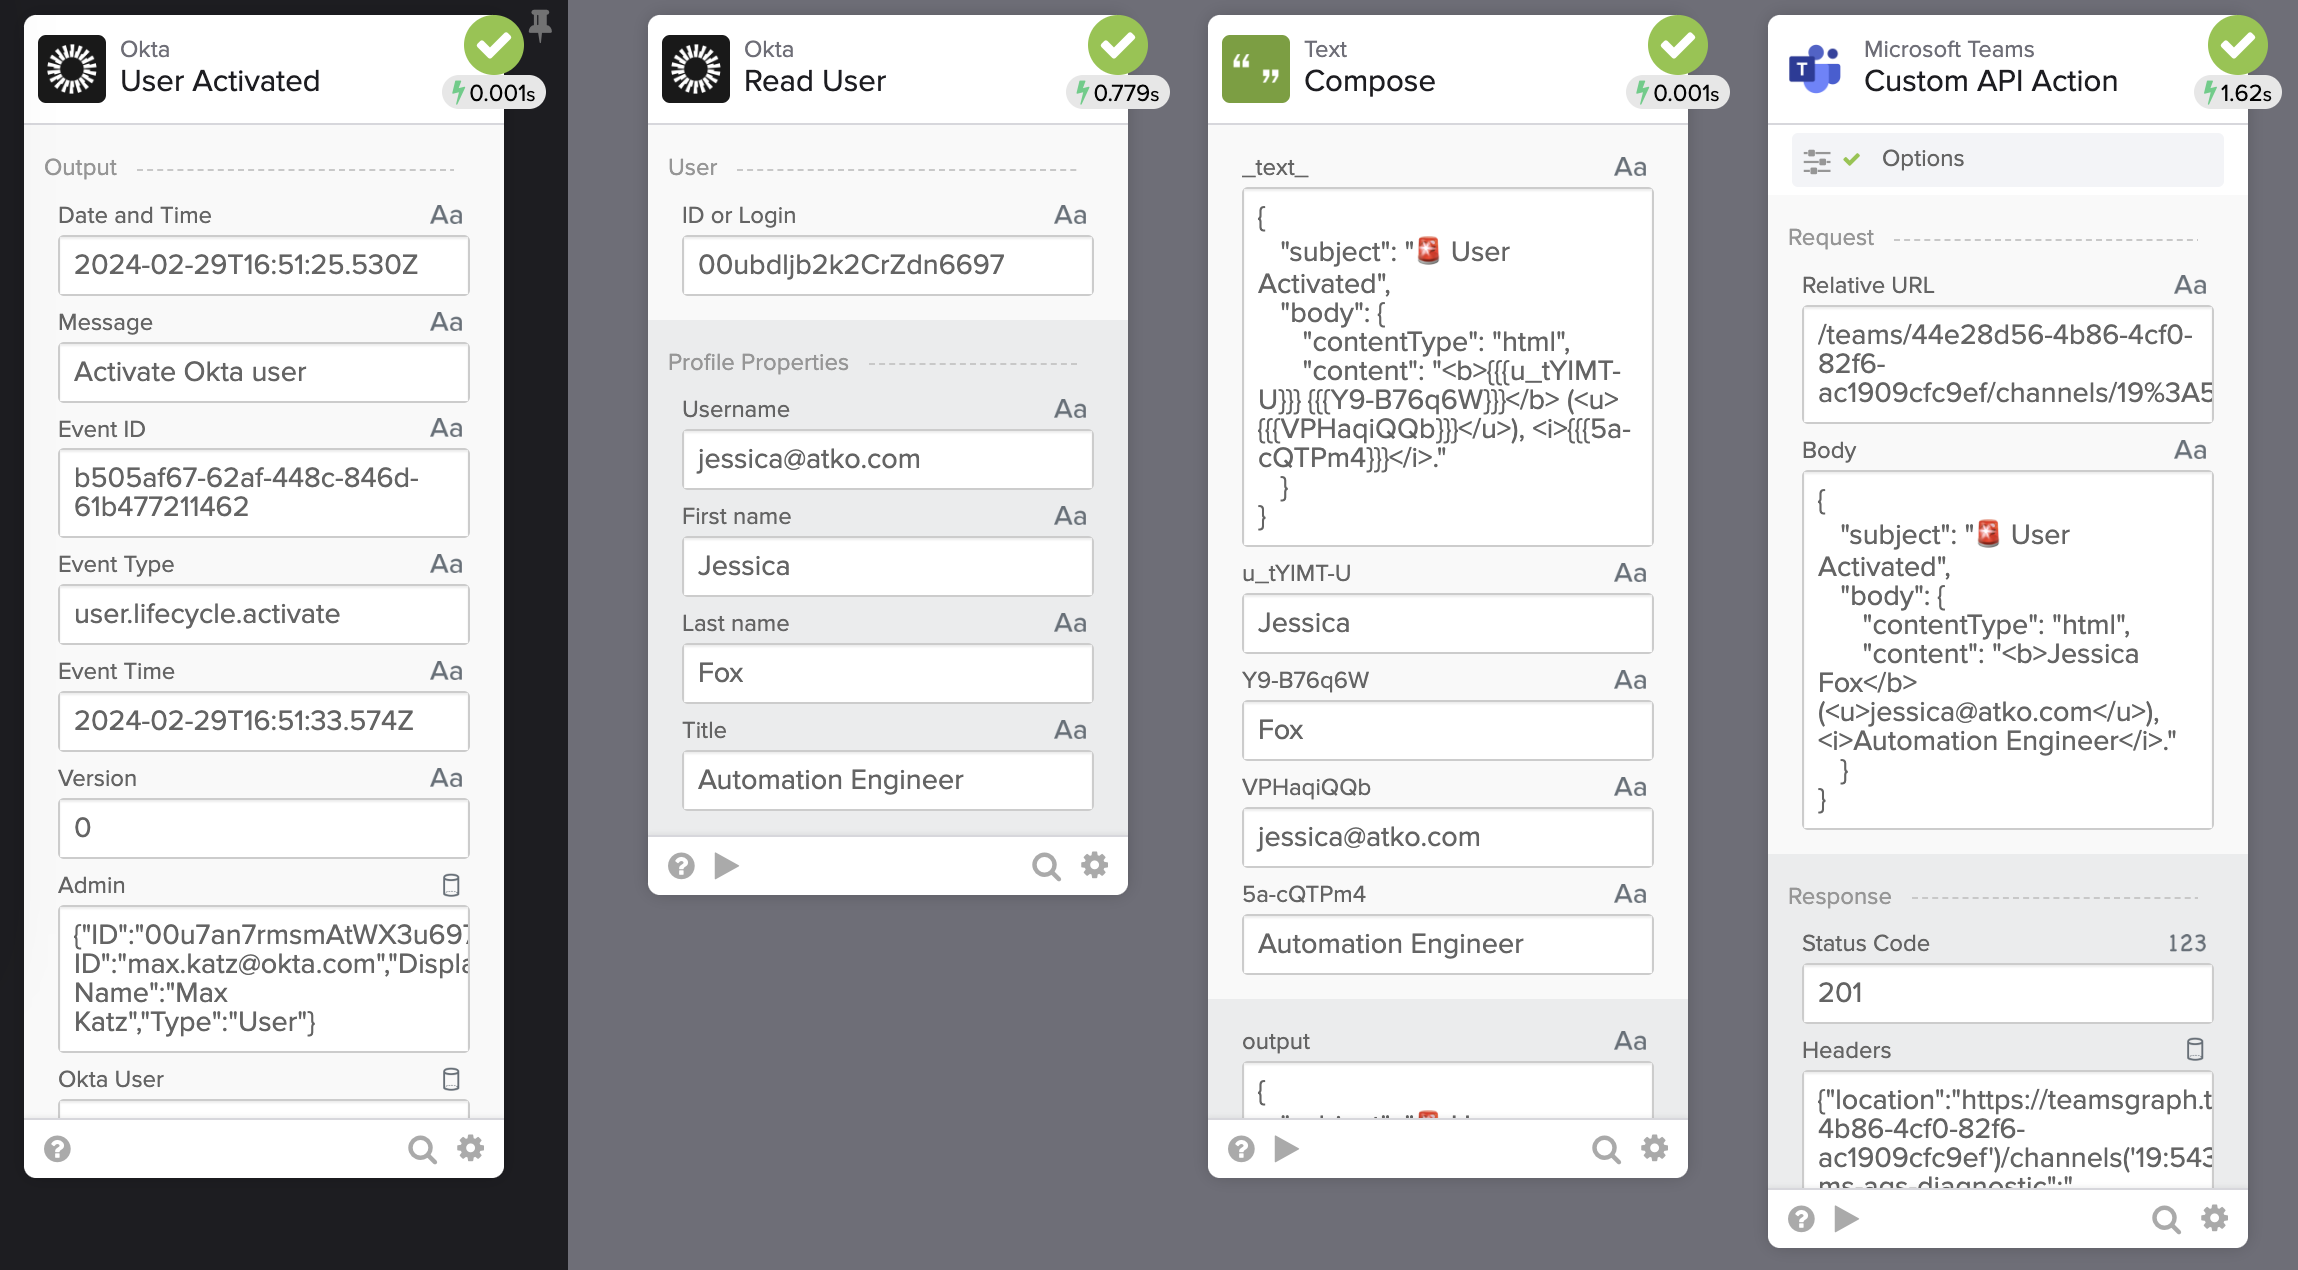
Flow history execution.
The message in Microsoft Teams:
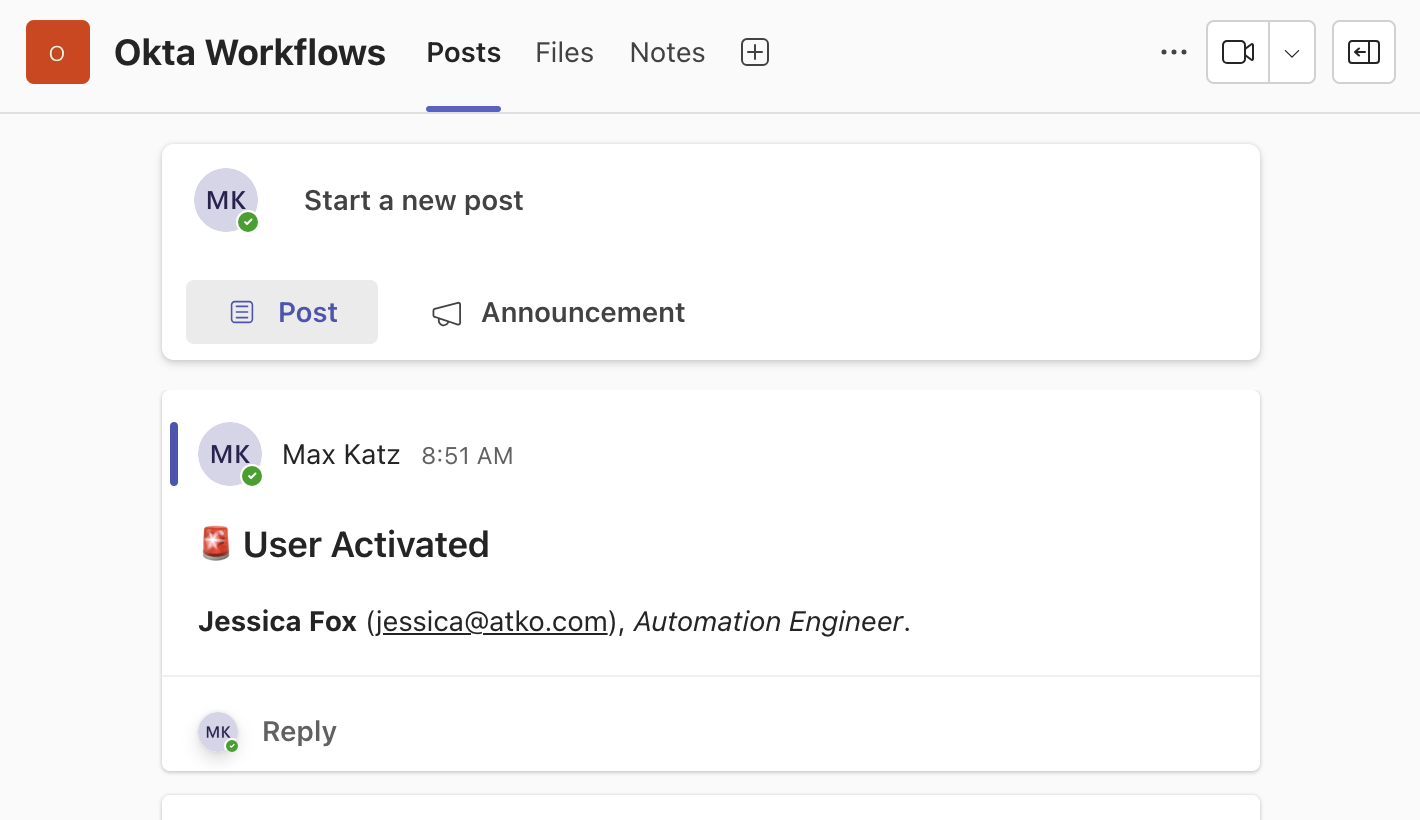
Message in Microsoft Teams.
Things you will learned:
- How to send a rich message with Microsoft API.
- How to use the Custom API Action card with Microsoft API.
This tutorial is part of Okta Workflows with Microsoft series:
- Send an Email Notification for a New Okta Event
- Send a Notification to Microsoft Teams for a New Okta Event
- Send a Rich Message to Microsoft Teams for a New Okta Event Using Microsoft API
Okta Workflows resources
🍫 Get help from Workflows specialists during weekly community office hours.
📺 Learn from Workflows videos.
🛟 Get help from support: discuss a Workflows topic or ask a question.
🙋🏻♀️ Get help from the community: join the #okta-workflows channelon MacAdmins Slack.


